
Am Self-Order-Kiosk bestellen und bezahlen Gäste selbst. Der Kiosk ist ein Modul. Jedes Kiosk-Gerät zählt wie eine Kasse.
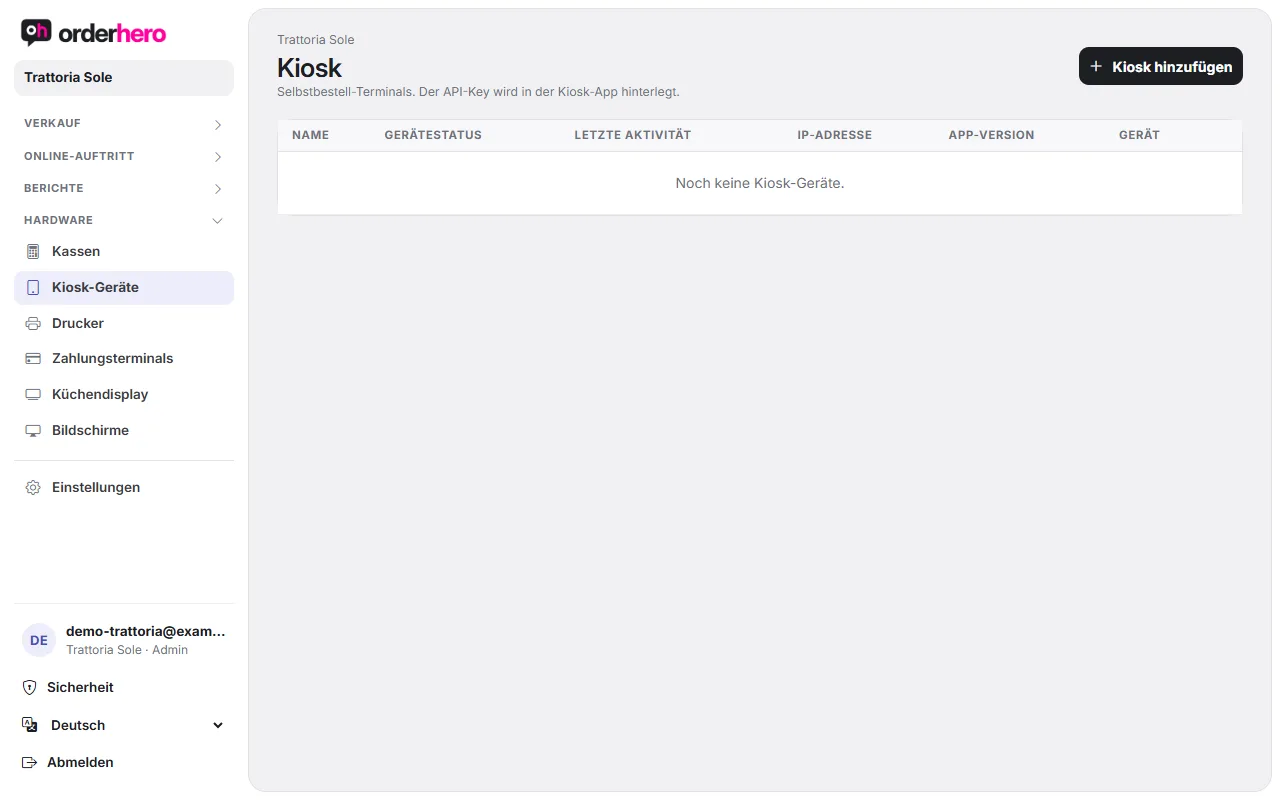
Create and connect kiosk device
- Öffne im Dashboard Hardware → Kiosk und tippe auf „Kiosk hinzufügen“. Gib einen Namen ein, zum Beispiel „Kiosk 1 Eingang“.
- On the new device, tap "Pair". You'll get a 6-digit code that is valid for 15 minutes.
- Die Kiosk-App ist nicht im Play Store. Du bekommst sie vom orderhero-Support, meist ist sie auf gelieferten Geräten schon installiert.
- Open the admin menu on the kiosk: quickly tap the top right corner of the home screen five times. As long as the kiosk isn't connected yet, the menu opens without a code. After that, the kiosk asks for the PIN of a manager at your business (a staff member with the Manager role).
- Wähle „Mit Kopplungscode verbinden“ und gib den Code ein.
- Restart the app. The kiosk then loads the menu, prices and design from the dashboard.
In the list under Hardware → Kiosk you can see whether the device is "Connected" (active in the last 2 minutes). Use pause and the trash can to deactivate or delete it. Menu, prices and sold-out status come live from the dashboard. Support installs kiosk app updates remotely.
Printer and card payment at the kiosk
- Bondrucker: Der eingebaute Drucker des Kiosks druckt Beleg und Abholnummer. Lege ihn unter Hardware → Drucker an und ordne ihn dem Kiosk unter „Hardware-Zuordnung“ zu. Küchenbons gehen an den Küchendrucker bzw. das Küchendisplay.
- Kartenzahlung: Der Kiosk kassiert über das zugeordnete Kartenterminal (Stripe-Lesegerät unter Einstellungen → Kartenzahlung oder ZVT-Terminal unter Hardware → Zahlungsterminals).
Set up kiosk
Öffne Bestellkanäle → Kiosk. Oben wechselst du zwischen den Reitern Darstellung, Promo-Banner, Upsell, Trinkgeld und Pager-QR-Codes.
Display
- Start image, start video, slideshow: Background of the start screen. The priority is video, then slideshow, then image. With “Dimming” you make the logo and texts easier to read.
- Colors & font, tiles & cards, menu layout: Colors, font sizes, category bar (top or left), items per row and display of descriptions.
- Order mode: You offer “Dine-in” and/or “Take-away”. If only one is active, the selection step is skipped.
- Abholmodus nach dem Kauf: „Keine Eingabe“ (nur Bestellnummer), „Tischnummer“, „Pagernummer“ oder „StatusMonitor“. Mit „QR-Code-Scan erforderlich“ muss der Gast den Pager vor der Zahlung scannen.
- Payment methods: Card and cash. If only one is active, the selection is skipped. For cash, the guest pays at the POS.
Promo banner
Full-width promo images that appear in the menu between categories. A tap opens the linked product. The order determines after which category a banner appears. We recommend 1200 × 400 px as JPEG. With "Slideshow settings" you set the automatic change in seconds (0 means off).
Upsell
Hier stehen Produktpaare, die häufig zusammen bestellt werden. Sie werden automatisch aus der Bestellhistorie berechnet. Deaktivierte Paare schlägt der Kiosk nicht vor. Die ersten Daten erscheinen nach den ersten Bestellungen.
Tip
You turn on the tip selection in the cart and set up to 6 percentage options (for example 5, 10, 15). There's also a default selection and, optionally, a custom entry as a percentage or fixed amount.
Pager QR codes
Mit Pagern bekommt der Gast nach der Bestellung einen Pager und wird gerufen, wenn das Essen fertig ist. Wähle den Nummernbereich, tippe auf „Anzeigen“ und dann auf „Drucken“. Klebe jedes Etikett auf den passenden Pager. Die Nummer lässt sich am Kiosk auch einfach eintippen.
Discount codes at the kiosk
Gäste lösen Codes im Warenkorb ein („Rabattcode einlösen“) per Scan oder Eingabe.
- Öffne Einstellungen → Rabatte und tippe auf „Rabatt anlegen“.
- Gib eine Bezeichnung ein und wähle Prozent (%) oder Betrag (€). Optional begrenzt du die maximalen Nutzungen.
- Fill in the "Code" field. It's only needed if guests should redeem the discount themselves at the kiosk. The code is converted to uppercase and can be printed as a QR code (click QR).
At the POS, all active discounts are available under “Discount on receipt”, even without a code, for example for staff or regulars. The discount is distributed proportionally across the tax rates.
Multiple languages and failover protection
Guests choose their language. You set which languages are available under Settings → Languages. Paid orders are saved locally and transmitted as soon as the connection is back.