
Die Speisekarte pflegst du einmal im Dashboard. Sie gilt für Kasse, Kiosk, Online-Shop, QR am Tisch, Küchendisplay und Menüboards gleichzeitig.
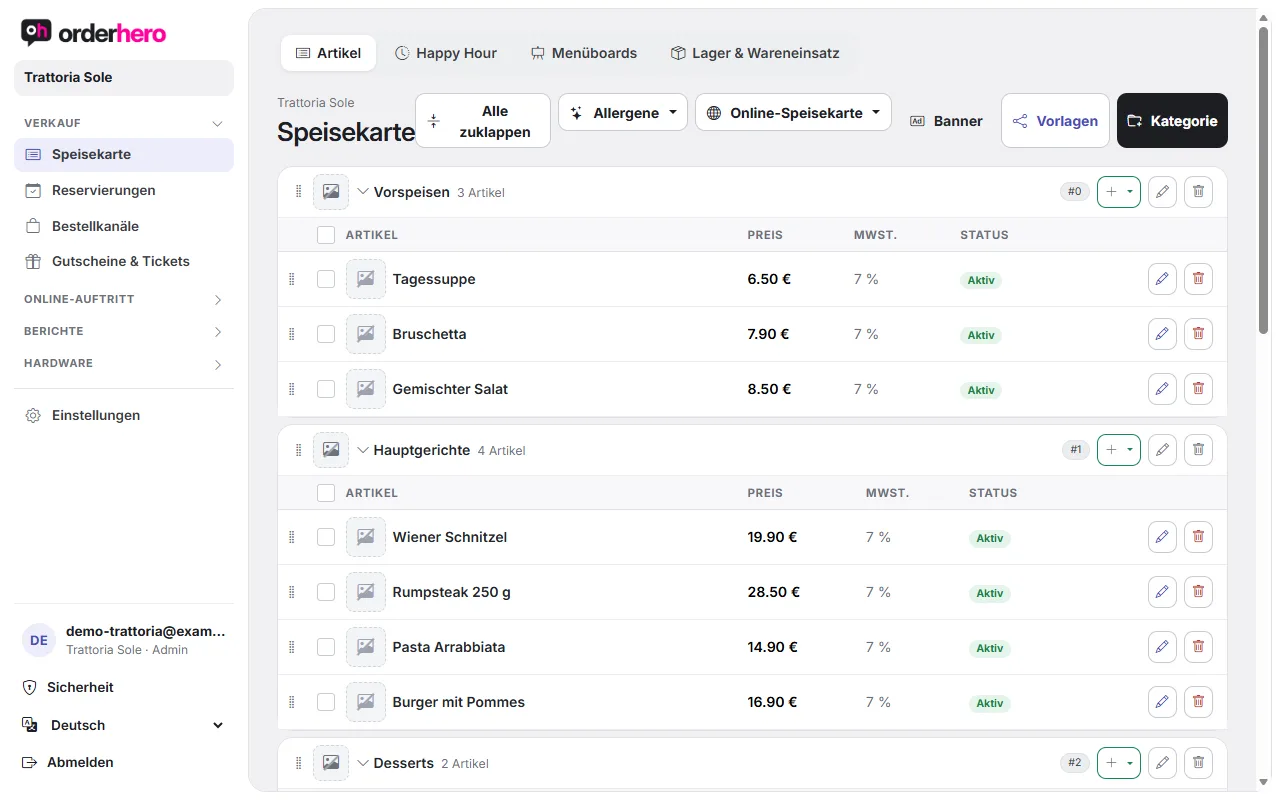
Öffne sie über Speisekarte in der Navigation.
Create category
- Tap "Category" at the top right.
- Enter the name and the order. Categories are sorted in ascending order by this number.
- Tap “Create”.
With "Edit category" you can change the name, order, image, banner image and translations, and hide the category ("Visible").
Create item
- In the category, tap the plus icon and choose “Add item”.
- Trage Name, Preis (€) und MwSt.-Satz ein (19 %, 7 % oder 0 %). Beschreibung und SKU sind optional.
- Tap “Add”.
With “Takeaway: all at 7% (food)” or “… at 19% (drinks)”, you set the tax rate for an entire category in one step.
Edit item
Open an item. At the top you'll see the tabs General, Image, Translations, Options and Cross-selling.
- General: Name, description, allergens, price, VAT rate, category, “Visible”, “Available”, quantity, “Offer in” (POS, kiosk, online shop, delivery services, online menu & website, Google) and deposit.
- Bild: Das Bild erscheint im Menü und im Bestell-Popup.
- Cross-Selling: Produkte, die der Kiosk nach dem Hinzufügen als Vorschlag zeigt.
Check several items to deactivate (sold out), archive or delete them together. Archived items disappear from the kiosk and POS but are kept.
Optionen und Beilagen
In the "Options" tab, you create option groups, for example "Choose size" or "Extras". They appear in the order popup as a selection list.
- Under “New option group”, enter the group name and set the maximum selection. Set “Required” if the guest has to choose something.
- Tap “Create group”.
- Add options: option name, surcharge in €, “Default” for the preselection. Optionally, link the option to another item.
- In the group, you set Min and Max (0 means unlimited) and enter translations.
Die Anpassungs-Ansicht bestimmt, wie der Gast den Artikel konfiguriert: Standard (Bottom-Sheet), Bottom-Sheet (Flat) oder Schritt-für-Schritt (Wizard).
Global templates for multiple items
If the same sides appear on many items, use templates:
- Tippe auf der Speisekarte auf „Vorlagen“.
- Create a template with its options.
- Link them in the item under "Options" with "Link global template".
Changes to a template apply to all linked items.
Multiple languages
You manage dish translations per item and category in the "Translations" tab. You define which languages are available under Settings → Languages.