
The setup wizard guides you to a ready-to-use POS in four steps. Below it is a checklist of everything that needs to be done before the first real receipt.
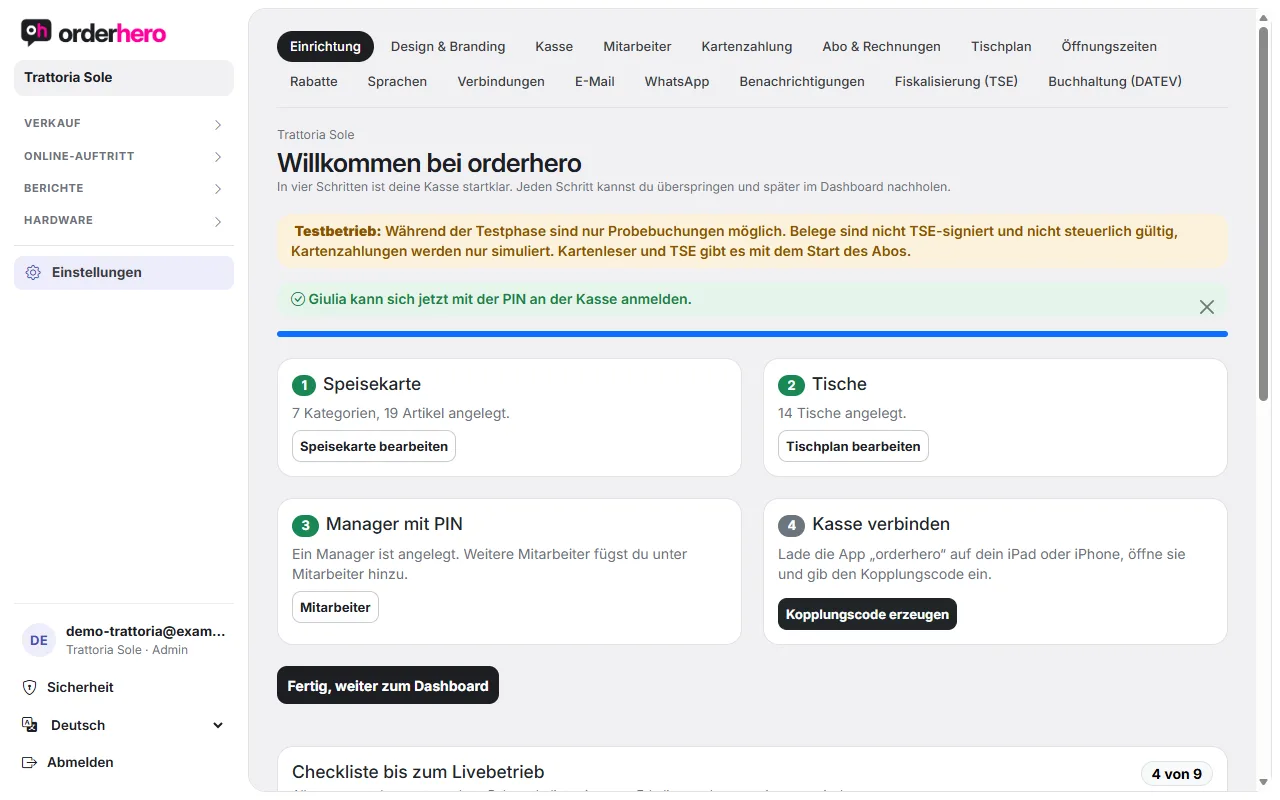
You'll find both under Settings → Setup. You can skip any step and complete it later.
The four steps
- Menu: Choose a template and tap “Apply template”. In it, food has 7% and drinks 19% VAT. You can adjust prices and items afterwards. You can also tap “Set up myself instead”.
- Tables: Enter how many tables you have. They're created in a grid, and you can arrange them later in the floor plan. If you run a counter-only or takeaway business, skip this step.
- Manager with PIN: The manager logs in to the POS with their PIN. They can void and close the shift.
- Connect the POS: Download the “orderhero” app to your iPad or iPhone and enter the pairing code. You get the code with “Generate pairing code”. It's valid for 15 minutes.
Mit „Fertig, weiter zum Dashboard“ schließt du den Assistenten ab.
Go-live checklist
Erledigtes erkennt orderhero automatisch. Oben siehst du, wie viele Punkte schon fertig sind. Die Liste enthält:
- Create menu
- Company details and tax number (under Design & Branding)
- Manager with PIN
- Connect register
- Receipt and kitchen printers (optional)
- Card payment
- Choose plan
- Set up TSE
- Live mode
- Register POS with the tax office
- Benachrichtigungen aufs Handy (optional)
Each item has a button (“Do it”, “View” or, for the tax office registration, “Data sheet”) that takes you straight to the right page.
Notes
- Name, address and tax number (or VAT ID) must appear on every receipt. Enter them under Settings → Design & Branding.
- While you're in test mode, receipts are test receipts. Live mode is enabled as soon as your plan and TSE are set up.
- Die Meldung der Kasse beim Finanzamt ist Pflicht. Siehe „TSE (fiskaly) einrichten und Kasse beim Finanzamt melden (ELSTER)“.