
Im Tischplan legst du Räume und Tische an. Die Kassen-App zeigt ihn als Startbildschirm, und die Online-Reservierung nutzt ihn für die Kapazität.
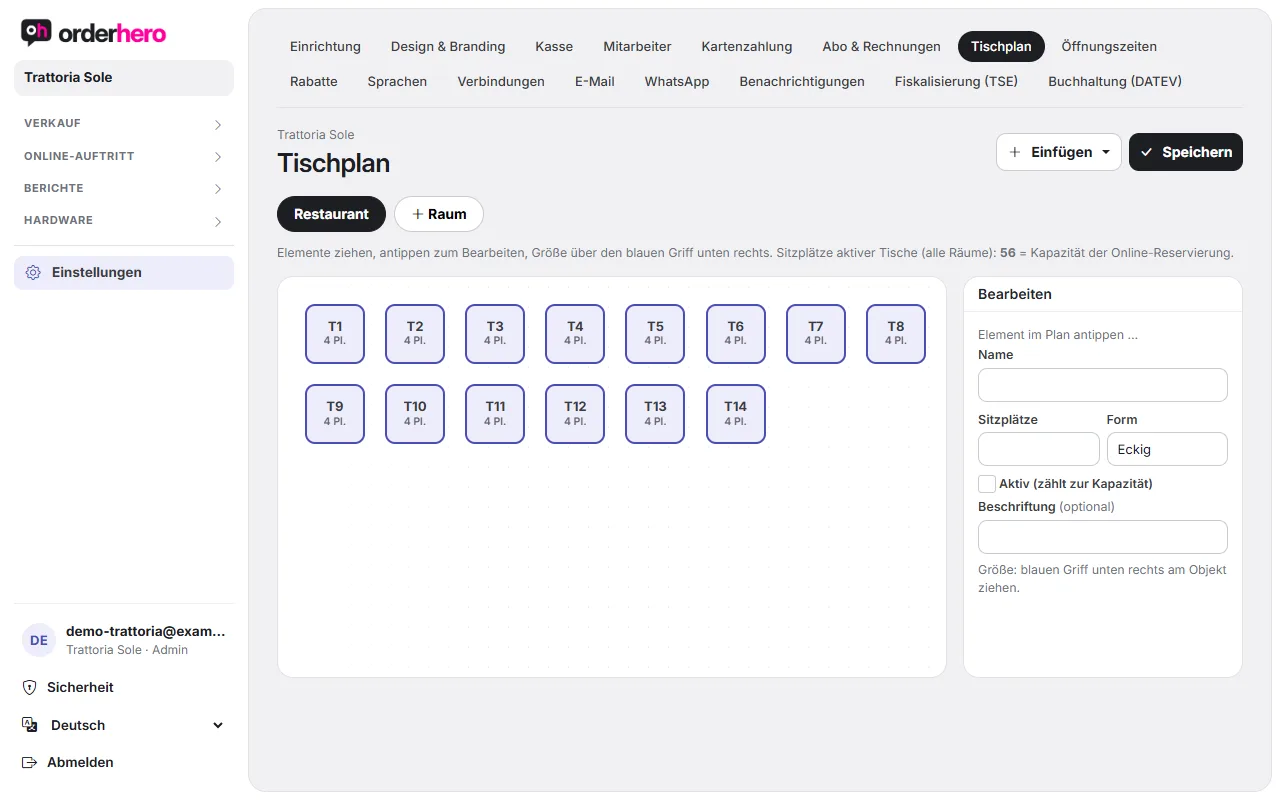
Öffne ihn im Dashboard unter Einstellungen → Tischplan.
Tische und Elemente einfügen
- Tippe auf „Einfügen“.
- Choose what you want to add: table, round table, wall, plant, counter / bar, or other.
- Ziehe das Element an die richtige Stelle. Die Größe änderst du am blauen Griff unten rechts am Element.
- Tap “Save”.
Wände, Pflanzen und andere Elemente dienen nur der Orientierung. Du kannst sie mit einer Beschriftung versehen.
Edit table
Tap an element in the plan. On the right you'll see "Edit" with these fields:
- Name: So heißt der Tisch an der Kasse und auf dem Bon.
- Sitzplätze: Anzahl der Plätze.
- Form: Eckig oder Rund.
- Active (counts toward capacity): Only active tables count for online reservations.
- Label (optional) for elements without a table.
"Remove" deletes the element.
Mehrere Räume
Räume erscheinen als Reiter über dem Plan, zum Beispiel „Terrasse“. Mit dem Plus-Symbol („Raum“) legst du einen neuen Raum an. Zum Umbenennen eines Raums tippst du doppelt auf seinen Reiter. Einen Raum löschen kannst du mit dem Papierkorb-Symbol neben den Reitern („Aktuellen Raum löschen“). Dabei verlieren seine Tische die Zuordnung. Vergiss nicht, danach auf „Speichern“ zu tippen.
Below the plan is the total number of seats across all active tables in all rooms. Next to it is the capacity for online reservations.
Good to know
- In the setup wizard, you quickly create tables in a grid. You can arrange them here.
- Reiner Theken- oder Imbissbetrieb: Du brauchst keine Tische.
- Printed QR table stands for "QR at the table" stay valid even if you rename a table. More in the article "QR ordering and QR payment at the table".
- In the POS app, you can long-press an order and drag it to another table to move or merge it.